
Connecting your Lexmark printer to Wi-Fi allows for easy wireless printing from any device, no matter where you are at home or in the office. However, users who do not have much knowledge about it often get confused and cannot take advantage of wireless printing. As a result, they become tangled in a mess of wires, which leads to delayed work. So, how to connect a Lexmark printer to Wi-Fi? You can use the control panel through settings, Wi-Fi Protected Setup (WPS), the wireless setup wizard, or the installation CD. The last option is rarely used, while all other options are common. In this post, we’ll go over all these methods to connect a Lexmark printer to Wi-Fi.
Benefits of Connecting a Lexmark Printer to Wi-Fi?
Connecting a printer to a Wi-Fi network offers the following advantages:
- Print from anywhere in your network without cables.
- This process supports multiple devices, like laptops, smartphones, and tablets.
- You can turn on cloud and mobile printing features.
How to Connect a Lexmark Printer to a Wi-Fi Network?
To connect the printer wirelessly, it is essential to have the following:
- Your Wi-Fi network name (SSID) and password.
- Ensure that your Lexmark printer has wireless connectivity.
- Placement of your printer in the range of your Wi-Fi router i.e., both devices should be in one room.
- A powered-on printer that is in the ready state.
Methods to Connect a Lexmark Printer Wirelessly.
Method 1: Using the Printer’s Control Panel—Easiest & Most Recommended

In many Lexmark printers, you can connect directly to Wi-Fi from the control panel.
- Access Settings: From the printer’s home screen, touch or navigate to Settings.
- Go to Network/Ports: Select Network/Ports > Wireless.
- Start Wireless Setup: Choose Setup On Printer Panel. You may also choose the Wi-Fi Protected Setup option.
- Select Your Wi-Fi Network: The printer will begin to scan for available networks. Select your SSID.
- Enter Wi-Fi Password: Now, enter your Wi-Fi password (case-sensitive).
- Complete Wireless Connection: Confirm the Wi-Fi connectivity and wait for the printer to connect. You will see a confirmation message when successful.
Method 2: Using Wi-Fi Protected Setup (WPS)
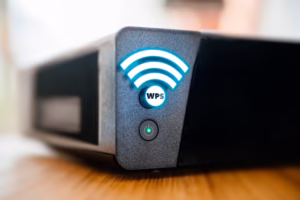
If your router and printer are compatible with WPS, this is a quick way to set up the wireless connection without entering a password.
- Press the WPS Button on Your Router: The WPS button (usually labeled) is present at the back of the router. It has the image of two arrows chasing each other.
- Start WPS on Printer: On the printer, go to Settings, followed by Network/Ports > Wireless > Wi-Fi Protected Setup. Choose Start Push Button Method.
- Follow On-Screen Instructions: Use all the instructions on your screen and your Lexmark printer will automatically connect to the Wi-Fi network.
Method 3: Using the Lexmark Wireless Setup Wizard

Some printer models feature a Wireless Setup Wizard to allow a secure connection. You can see it on control panel. However, before using this method, install a wireless network adapter in your printer and ensure its functioning.
- Go to Wireless Setup Wizard: From the home screen, select Settings. Choose Network/Ports > Wireless > Wireless Setup Wizard.
- Select Network and Enter Password: Use all the prompts to select your network and enter the password.
- Finish Setup: Wait for confirmation of a proper network setup.
Method 4: Connecting via Installation Software (Windows/Mac)

You can also install the printer drivers using the Lexmark installation CD. The specific instructions to use this CD for installing drivers are mentioned in the instruction sheet that comes with the wireless network adapter.
After inserting the CD, you need to extract the installation package and then click Install when the installer opens. Accept the license agreement, choose your printer, and choose the printer driver. You may need to have a temporary USB connection to transfer Wi-Fi settings. Disconnect it when prompted and finish the installation.
How to Connect a Lexmark Printer to a Phone?

To connect a Lexmark printer to a phone, switch on Wi-Fi Direct. Then, enter your printer’s credentials. Alternatively, use the Lexmark print app that lets you send documents from your printer to a phone.
- Go to Settings.
- Select Enable Wi-Fi Direct.
Note the printer’s SSID (network name) and PSK (password). To do so, print the network setup page. - To print the setup page, go to Settings> Reports > Network > Network Setup Page.
- Find the Wi-Fi Direct details needed to connect your phone.
- On your phone, go to Wi-Fi settings.
- Turn on the Wi-Fi.
- Select your printer’s SSID (usually starts with “DIRECT-“).
- Enter the PSK or password.
- Confirm the connection.
Concluding Words
Now, you know how to connect a Lexmark printer to Wi-Fi. Use the above-mentioned methods for a smooth setup. If the network connection disconnects, check for router firmware updates or try a different Wi-Fi channel. Contact Lexmark printer support if you need more help with the process or cannot set up the wireless connection.
Frequently Asked Questions
1. Why is my Lexmark printer not connecting to Wi-Fi?
Check if the printer and router are close together. Connect to the 2.4GHz band if 5GHz Wi-Fi is incompatible. Restart the Lexmark printer and router, and reset network settings.
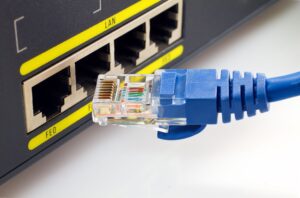
2. How to connect a Lexmark printer to Ethernet?
Download the Software and Documentation CD from the Lexmark support page. Run the package and install it. Select the Ethernet connection and connect the cable. Choose your printer from the selection and follow the points.
3. What is the Lexmark printer app for Windows 10?
Lexmark printer app for Windows 10 is the Lexmark Universal Print Driver, which offers a standardized solution for automatically installing Lexmark printer drivers upon detecting a USB or network-connected printer through its In-OS (in-operating system) class drivers